Design Support
(Help Desk)
(Help Desk)
The Design section of your account is where you can name your event, create the event description, add your event logo & optional banner design, and even customize the event URL. Below are many of the most common questions related to this area.
I. How to customize your event logo.
You can easily add your own event logo. Simply hover over the default event logo design as shown below and upload your own. (If the logo you upload is too large in size, it will let you know. You'll need to make it smaller if that happens, which is rare). [Screenshot below]
You can easily add your own event logo. Simply hover over the default event logo design as shown below and upload your own. (If the logo you upload is too large in size, it will let you know. You'll need to make it smaller if that happens, which is rare). [Screenshot below]
II. How to customize you event URL.
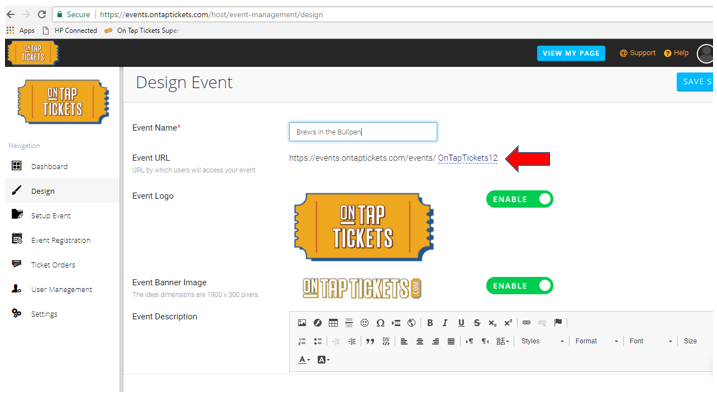
You can customize your event URL to add your event name (or a variation of your event name). Simply click on the URL area below and type in your desired event name. If it's available, you'll know right away. [Screenshot below]
You can customize your event URL to add your event name (or a variation of your event name). Simply click on the URL area below and type in your desired event name. If it's available, you'll know right away. [Screenshot below]
III. How to customize your event banner.
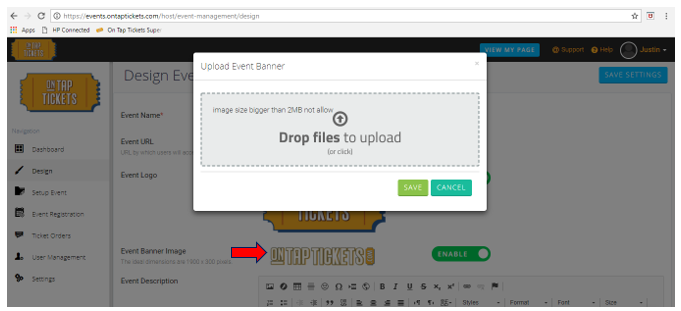
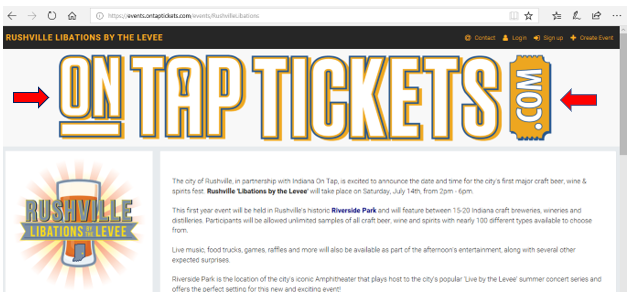
You can customize the event banner to give your event page even more branding power, if you'd like. Simply hover over the default banner design to upload your own. The ideal size of that banner image should be 1900 x 300. The first screenshot below shows where to make this change, the second screenshot shows you the banner area on your actual event page that you would be changing. *Most event organizers don't change the banner image, but it's a great option to have for those interested.
You can customize the event banner to give your event page even more branding power, if you'd like. Simply hover over the default banner design to upload your own. The ideal size of that banner image should be 1900 x 300. The first screenshot below shows where to make this change, the second screenshot shows you the banner area on your actual event page that you would be changing. *Most event organizers don't change the banner image, but it's a great option to have for those interested.
IV. How to create and/or edit your event description.
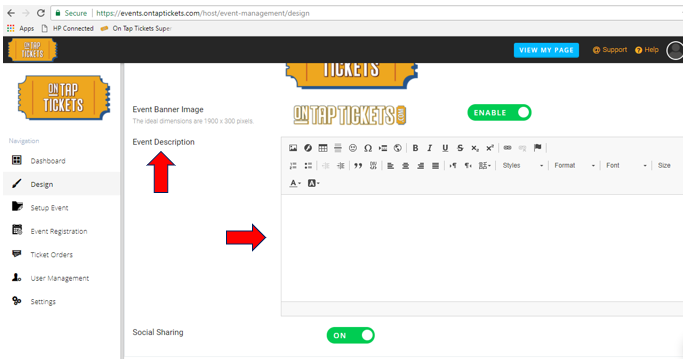
You can create your event description in any way you'd like and can edit it at any time. Our HTML editor allows for a wide variety of formatting options. You also have the option to insert images into the event description itself if you'd like to highlight or recognize certain vendors or sponsors with your event. [Screenshot below]
You can create your event description in any way you'd like and can edit it at any time. Our HTML editor allows for a wide variety of formatting options. You also have the option to insert images into the event description itself if you'd like to highlight or recognize certain vendors or sponsors with your event. [Screenshot below]
V. Social Sharing
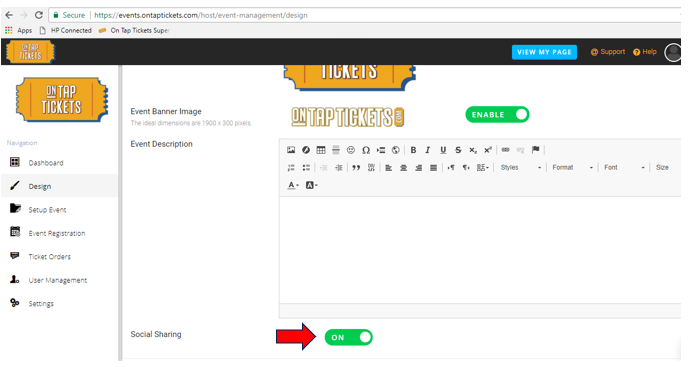
By default, the social sharing function is set for 'on' for your events. This allows interested or confirmed ticket buyers to easily share your event to their Facebook and/or Twitter audiences with a single click when visiting your event page. It's an opportunity for free promotion of your event. We highly recommend you keep this option enabled, but you do have the option to disable it at any time. [Screenshot below]
By default, the social sharing function is set for 'on' for your events. This allows interested or confirmed ticket buyers to easily share your event to their Facebook and/or Twitter audiences with a single click when visiting your event page. It's an opportunity for free promotion of your event. We highly recommend you keep this option enabled, but you do have the option to disable it at any time. [Screenshot below]


